Laser levels are an essential tool for professionals and DIY enthusiasts looking to achieve precision in alignment and leveling tasks.
Whether you’re installing tiles, hanging pictures, or constructing a building, using a laser level ensures accuracy and efficiency.
This comprehensive guide explores how to use laser levels effectively, the different types available, best practices, troubleshooting tips, and key factors to consider when purchasing one.
What is a Laser Level?
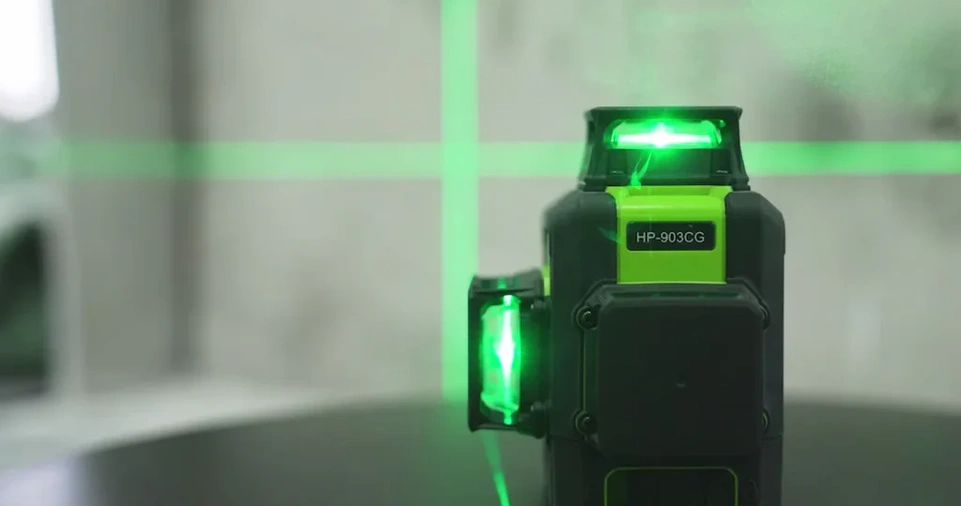
A laser level is a tool that projects a visible laser beam onto surfaces to indicate a straight, level, or plumb line.
It eliminates the need for traditional leveling tools like spirit levels, making the process faster and more accurate.
They come in various types and are suited for different applications, ranging from home improvement tasks to large-scale construction projects.
| Type of Laser Level | Description | Best Used For |
|---|---|---|
| Dot Laser Level | Projects a single or multiple dots onto a surface. | Aligning frames, electrical work, and marking reference points. |
| Line Laser Level | Projects one or more straight lines horizontally or vertically. | Tiling, cabinetry, wallpapering, and general interior work. |
| Rotary Laser Level | Emits a rotating 360-degree beam. | Large construction projects, grading, and excavation. |
| Plumb Laser Level | Projects vertical and horizontal points. | Framing, plumbing, HVAC installation, and ceiling work. |
| Cross-Line Laser Level | Projects both horizontal and vertical lines simultaneously. | Flooring, drywall installation, and kitchen renovation. |
How to Use a Laser Level?

Using a laser level correctly ensures precise alignment in any project. Follow these steps:
Set Up the Laser Level
- Choose a stable surface or mount the laser level on a tripod.
- Turn on the laser level and allow it to self-level (if applicable) or manually adjust it.
- Position the laser level at the correct height for your project.
- Ensure the laser level is securely placed to prevent movement or vibrations.
Calibrate the Laser Level
- Check the accuracy using a known level surface.
- Adjust the calibration screws if necessary to ensure precision.
- Verify the laser’s level by cross-checking with a bubble level.
Mark the Laser Line
- Use a pencil or chalk to mark the projected laser line on the surface.
- If using a rotary laser, place targets along the projected path.
- Double-check alignment before making permanent changes.
Align and Work on Your Project
- Follow the marked lines while installing or aligning materials.
- Re-check alignment periodically to ensure precision.
- Use a laser detector in bright environments where the beam may not be visible.
Applications of Laser Levels
Laser levels are used across various industries and DIY tasks, including:
| Application | Recommended Laser Level |
|---|---|
| Hanging Pictures & Shelves | Line Laser |
| Installing Cabinets & Countertops | Line Laser |
| Tile Installation | Cross-Line Laser |
| Landscaping & Grading | Rotary Laser |
| Framing & Drywalling | Plumb Laser |
| Electrical & Plumbing Work | Dot Laser |
| Roofing & Structural Work | Rotary Laser |
| Concrete & Foundation Leveling | Rotary Laser |
Advanced Techniques for Using Laser Levels

Using Laser Detectors
Laser detectors help identify laser lines in bright outdoor conditions. These are essential for exterior construction projects where sunlight can obscure visibility.
Dual Laser Levels
Some laser levels provide both horizontal and vertical lines simultaneously, improving efficiency in applications like flooring, wall installations, and cabinetry.
Mounting for Stability
For maximum accuracy, use a tripod or a wall mount. This prevents unwanted movement that could affect alignment. Consider using a bracket system for added flexibility.
Multi-Laser Levels
Advanced models project multiple lines at different angles, allowing for intricate designs, such as ceiling grids and partition layouts.
ALSO READ: How to Maintain a Beautiful Lawn Year-Round?
Troubleshooting Common Issues
| Issue | Solution |
|---|---|
| Laser beam is not visible | Use laser-enhancing glasses or increase brightness. Check if the batteries are fully charged. |
| Laser level won’t self-level | Place it on a stable surface and ensure no obstructions. If using a manual level, adjust accordingly. |
| Uneven lines | Check calibration and adjust accordingly. Also, verify that the surface on which the level is mounted is stable. |
| Battery dies quickly | Use rechargeable batteries or keep spares on hand. Consider using a model with a longer battery life. |
| Inaccurate measurements | Verify that the laser is on a level surface and recalibrate if necessary. Ensure it is not obstructed by objects. |
Choosing the Right Laser Level

When selecting a laser level, consider the following factors:
- Accuracy – Look for models with a low margin of error to ensure precision.
- Self-Leveling Feature – Makes operation easier and more precise, especially for beginners.
- Range – Ensure it covers the required distance for your project; longer ranges are essential for construction work.
- Power Source – Battery-operated vs. plug-in options. Rechargeable models can save costs in the long run.
- Durability – Waterproof and shock-resistant models are best for construction sites where exposure to elements is common.
- Mounting Options – Tripods and wall mounts improve stability and versatility.
- Brightness & Visibility – Consider a model with high-visibility lasers, especially if working outdoors.
- Additional Features – Some models come with remote controls, adjustable beam intensity, or multiple mounting options.
Maintenance and Care
- Clean the lens regularly to prevent dirt buildup, which can distort the beam.
- Store in a protective case when not in use to prevent damage.
- Avoid dropping or exposing it to extreme temperatures to ensure longevity.
- Periodically check calibration to maintain accuracy, especially before starting a new project.
- Replace batteries or charge them fully before extensive use.
- Inspect for any physical damage and repair minor issues promptly.
ALSO READ: How to Choose the Right Outdoor Furniture for Your Climate?
Conclusion
Laser levels are invaluable tools for achieving precision in various projects, from home improvement to large-scale construction.
By understanding how to use them correctly and choosing the right type, you can ensure efficiency and accuracy in all tasks.
Whether you’re a professional contractor or a DIY enthusiast, investing in a high-quality laser level can significantly enhance your workflow and improve project outcomes.
Follow the best practices outlined in this guide to maximize your results, troubleshoot common issues, and maintain the tool’s longevity.
With proper use, a laser level will be one of the most reliable tools in your arsenal for years to come.